Constructing a Butterfly Net in Class Page 2
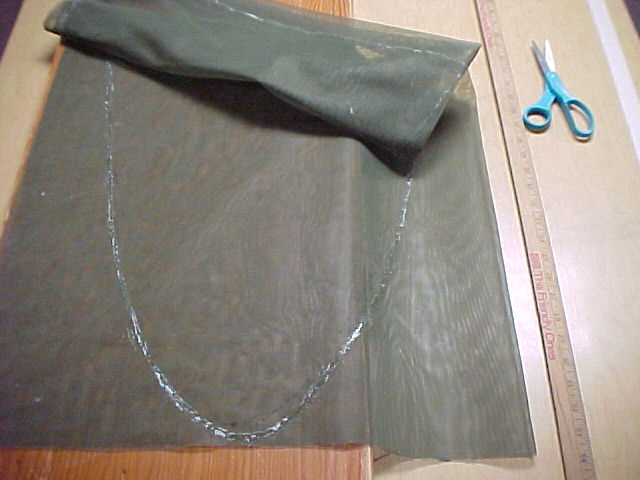
Fig 3. Left Sleeve for wire hoop
We made a sleeve of about 1 1/2 inches for the wire of the hoop ...
We folded the fabric over and tacked with masking tape....
Then used the glue gun to tack the netting in place about every
six inches ... removed the tape and applied enough of the "super
hot glue" to penetrate both layers ... lifting often so as not to
permanently stick to the "throw away" plywood we were using.
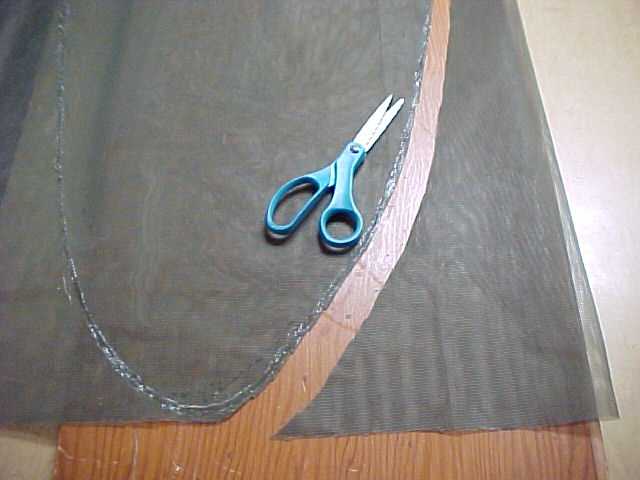
Fig 4. left Determine shape for the pocket or purse of the net
We placed a rope over two pins on front board ...
The distance between the pins was the diameter of the hoop ...
in this case 17 1/8 inches.
We let the rope hang down the distance that we had decided for
the length of the pocket ... 36 inches in this case.
We marked the outline of this parabola and used this our template
for the shape of the pocket ...
We folded the material over so that the two open ends of the sleeve
for the wire were together ...
Following our template, we tacked the netting material with the
glue gun about every six inches as above ... lifting often.
And then applied enough hot glue to penetrate thru both layers.
Fig 5. left
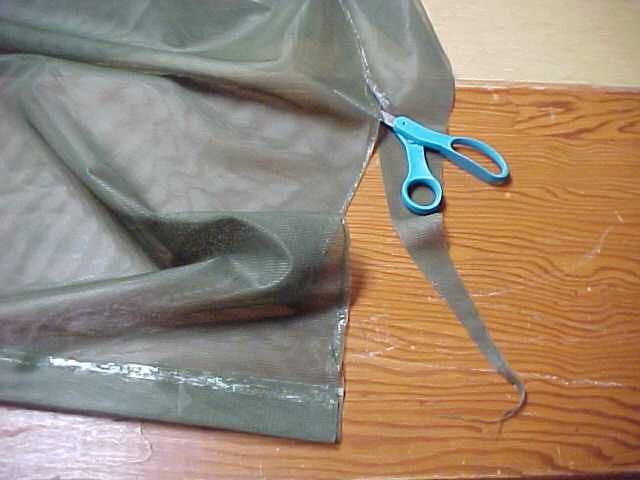
Fig 6. left below Cutting excess material away
After allowing hot glue to dry (still lifting several times to
be sure it isn't sticking to plywood ... a screw driver or a dull
table knife can be used to pry material from the plywood if it does
stick) then we cut away the outside of the pocket material.
This then completes the pocket or purse part of the net.
caution ... these procedures require use of hot glue gun ...
practice the steps carefully before some important is
permanently attached to something else!